| Green Tag Tool |
| Anyone May Use This Tool |
Base Table
| Tool Owner: Marcel Braun |
| Chat: not on Discord |
| Email: Contact board of directors |
Z-Axis
| Tool Owner: Tom Upchurch |
| Chat: @tomu on Discord |
| Email: See sticker on machine |
Discord thread for discussion of issues, help, demos, etc: EMS Discord: Large Bed CNC
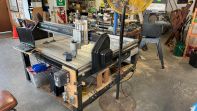
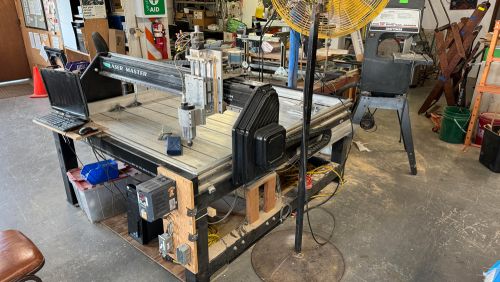
These are our collection of notes on the Laser CNC Master Restoration Project.
Specs
- Make: Cam Tech
- Model: LaserMaster CM155
- Year:
- Working Area in mm: X: 1300mm, Y: 1300mm, Z: 142mm
- Working Area in inches: X: 51.18", Y: 51.18", Z: 5.59"
- No longer exists. Thanks, stupid fire.
Process Overview
More details on each part of the pipeline in sections below
- Design your Project in Easel (or still untested, Carbide Create)
- Export gcode file as .nc
- CNC Pipeline Explained
- Setup Table
- Waste Board
- Material onto Waste Board
- Install Appropriate Mill end (bit)
- plug in Spindle & Turn On
- Launch UGS Software
- Reset Zero as safety
- Load .nc file
- Confirm dims with visualizer
- Move router into position
- Reset Zero for reals this time
- Create Drill locating hole
- Return to Ideal Zero
- Run Project
- Try it in the air first (go up a set amount and then reset zero)
- Try it with cheap material second
- Google appropriate speeds & feeds
- Try it with your final material, maybe a test piece first
- Stay in shop & keep an eye on the CNC table
- Take this time to help clean & organize other parts of the shop :D
- Wrap Up
- Clean up CNC area
- Remove project
- Reset CNC for next user
Software Overview & Design your Project
OVERVIEW
The three types of software used in CNC production are Design Cad, Toolpaths CAM & G-Code Control
as listed here:
Beginners guide to desktop CNC software
For our pipeline that means
Design Cad:
Easel, with the help of other software listed below.
Toolpaths CAM
Easel
G-Code Control
UGS
You can design your project in Easel, a web based software package.
Still to test that may also provide good results: Carbide Create
For more control, you can import line art into Easel as .svg files, from software such as:
Here's more details on how to use Easel (free CNC software)
Our computer only has UGS installed on it, so design work currently takes place on another machine (yours at home, the library, etc.)
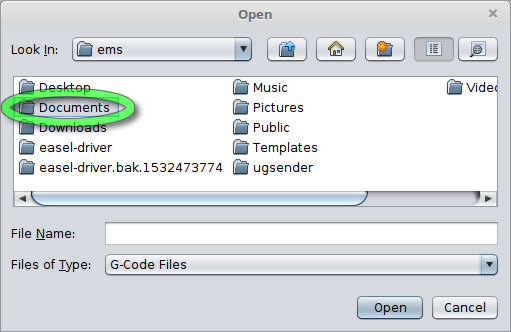
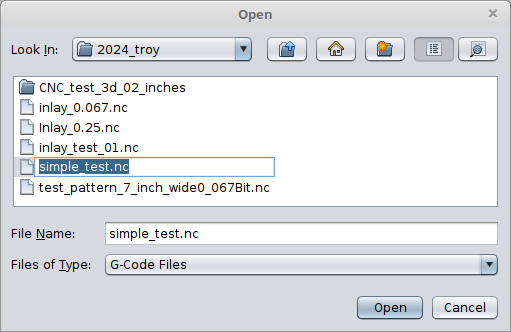
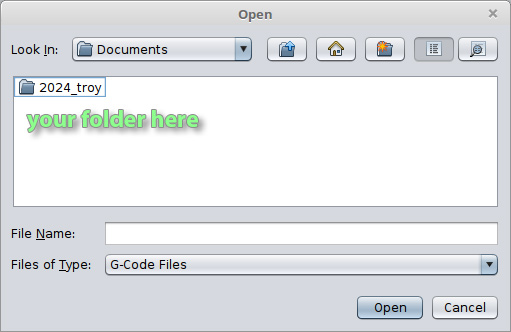
To keep the CNC computer tidy, please create your own subfolder in "Documents", and copy your files from a USB drive to this folder. Use the format 'year_yourName'
We've created a handy shortcut on the desktop for you!

Setup Table
Overview: Setup table:
- Clamp down Waste Board
- Secure (drill) Material onto Waste Board
- Install Appropriate Mill end (bit)
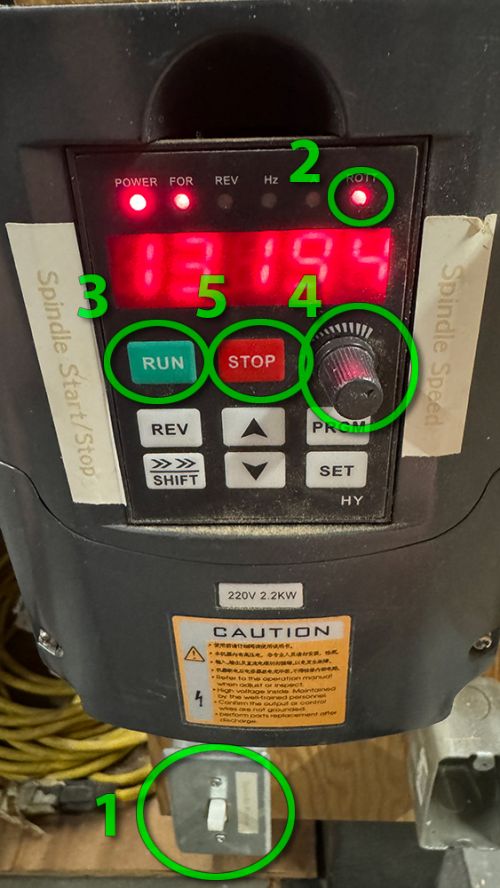
The PC controls the position of the router, using the UGS software. The inverter on the right controls the spindle rotation.
- Turn on the PC.
- It runs on Linux Mint, but feels similar to Windows.
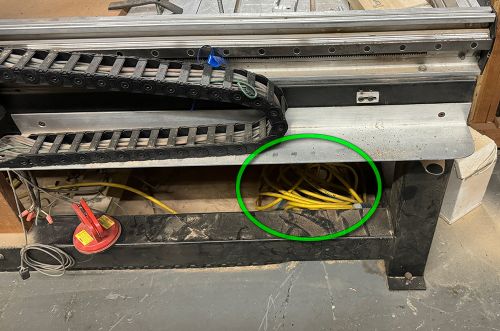
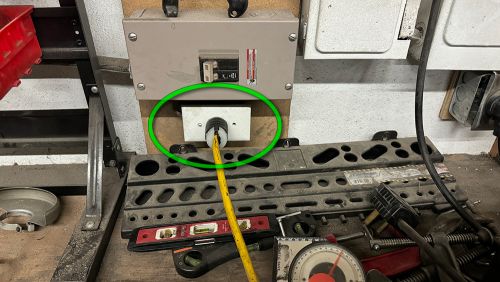
- Plug in the Spindle Controller to the 20 amp outlet in the welding area. Arrange cord for maximum safety.
- Turn on Spindle with light switch below it
- Confirm that readout only has the "Rot" lit
- If it has anything other than that, press "shift" until the lights toggle to the state shown in the picture
- Press "run" to start
- Adjust pot to adjust rotation speed
- Press "Stop" to stop rotation
Use UGS Software
This is the software that takes your gcode file you made in Easel and feeds it to the router line by line in a way that it will understand it.
Launch UGS by double clicking this icon:

Run the software by clicking Run. Must be a Linux thing.

Rough images below, explanations coming hopefully soon
Step 1: Click on "Open" to connect the software with the CNC controller. (It's a tiny little circuit board under the table. So Smol! So cute!)
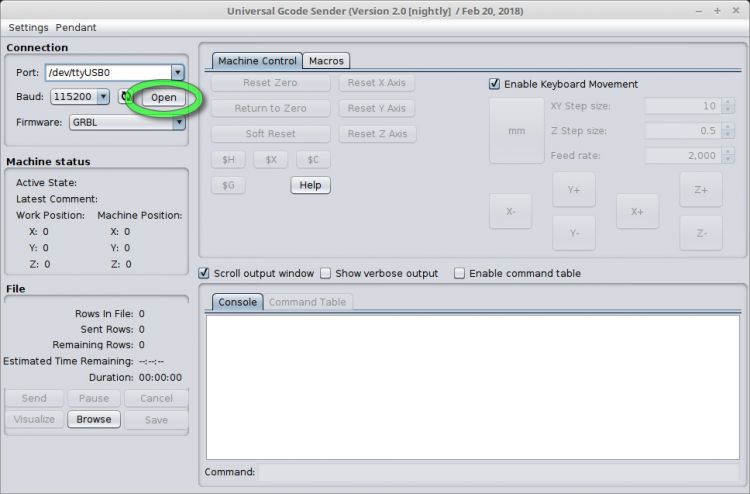
Before you do anything else: as a safety click on the 'Reset Zero' button. If you accidentally hit "Return to Zero", it will take the router back to this point.
Reason: Every time the computer is turned on, the "Zero" is a random locaiton. That location might be outside of the bed, and getting there could damage the tool and/or you.
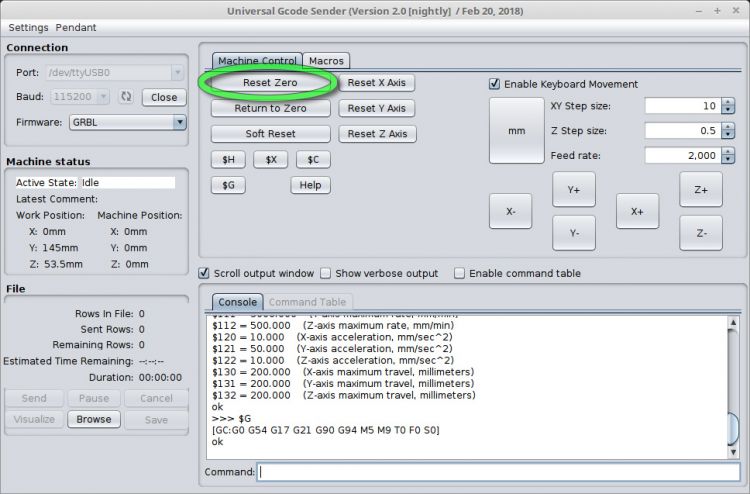
ZEROING
Note: When using Easel to make your tool paths, the CNC Router's Zero is the HIGHEST point on your project. This is the opposite from a FDM 3D Printer.
This makes sense though, because if you are carving a something, you literally can't set the zero point *inside* your material!
Technique for setting a drill locating hole:
From zebragirl: I would make a point of indenting the tool slightly in the home position, and doing the 'receipt thing' to get the tool' more-or-less exact home position set in relation to the work,
AND a spot I could eyeball it's correct return to, within +/- .5mm
like, a registration point that was -5mm, and -5mm from home.. drill in a bit. Then stop the tool, move up to clear the hole, then +5, +5..
then spend the time nudging the Z axis til it just grips a receipt, then 1 tap up.. and set home.
or.. x.. doesn't have to be 5mm, just 'something you can remember, like tap the arrows 2 times or something.
Once you've done that, it's easy to line up the bit again in the future, to the locating hole. Then it's super easy to reposition the tool to X-0 and Y-0.. then it's just a matter of slipping a piece of paper under the tool and adjusting Z until it 'just drags'
More detail:
so you don't drill a hole at the 'ideal'.. you drill it in the 'locating' spot.
Then if you ever have to re-zero the machine, you nudge the spindle around til the bit can fit properly in that hole and can hand-turn freely within it.
Once you've done that, you know how far you are away from the 'intended zero'. So you now lift up in Z..
then nudge over your 'set distance' in X , then in Y.. and you should be right over your intended zero point..
then all you have to do is the touch adjustment with a slip of paper to re-set Z..
Once the tool is again where "zero" is supposed to be, hit that 'reset zero' button.
it's so much easier to demonstrate than to explain in words. But if UGS is, for example, set to move 5mm every time you touch an arrow key..
you might move 'tap tap -X' , 'tap tap -Y' and then drill your registration hole there.. then it's just tap tap +X, tap tap +Y to get back to zero.
it just gives you something better than 'eyeballing' whether the bit is actually 'at zero'.
Reason: If the tool accidentally bumps an edge and loses accurate location, this is a good manual way to get back to it accurately. Also super handy if your file needs a tool change for detail work
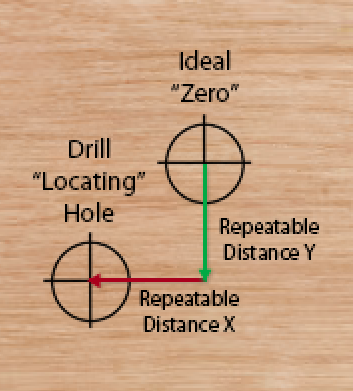
Other notes on setting perfect registration
Click the Visualizer button to see the tool path. Also confirm the Width & Height
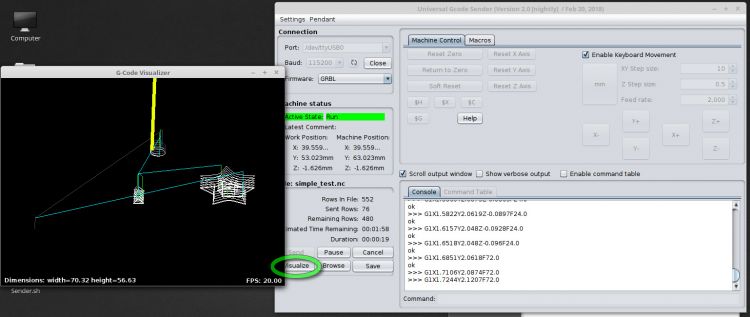
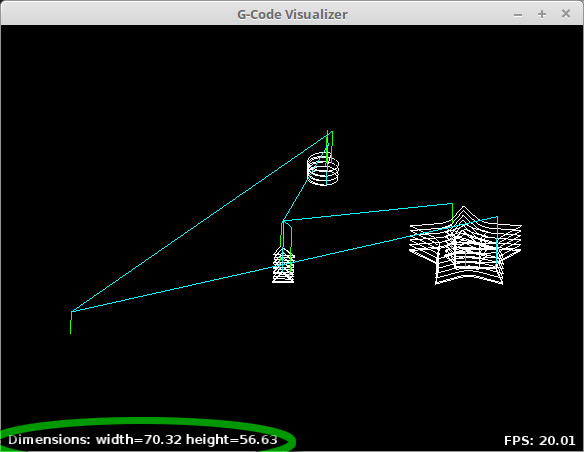
When ready to run the tool, press "Send"
Tip: Try it in the air first! Move the Spindle up in the air high enough that it won't come down on your work surface & run the tool.
You can use this to help you center your work before screwing it down on the waste board.
Wrap Up
Clean up CNC area
Vacuum the table and surrounding area.
Remove project
This is obvious, right?
Reset CNC for next user
Remove end mill and put away in bin underneath table.
Links
- Beginners guide to desktop CNC software
- How to use Easel (free CNC software)
- First Real Project with my New Carve by CNC4NEWBIE
- CNC 3018 PRO MAX - EASEL INVENTABLES / UGS
- Huanyang VFD Type 1 Inverter Notes: Controls the spindle. It can be controlled by Mach3 Software
- --------
- http://www.sawmillcreek.org/showthread.php?125009-Camtech-LaserMaster-Users
- http://www.dataworks.gr/old/uk/products/specif.htm
- http://www.cnczone.com/forums/commercial-cnc-wood-routers/172133-cnc.html
- http://www.laserform.ca/pdf/CAMTECH_brochure_email.pdf
- LaserCut 5.x Archive
- http://www.co2-lasers.com/blog/wp-content/uploads/2012/10/MPC6535-Software.rar
- Our Copy: MPC6535-Software.rar
- Note that if you extract this under Linux you will get many duplicate file names. Presumably, these are the 32, and 64 bit system files.
- Hardware Manual: MPC6535-Hardware_Manual.pdf
- Laser Manual: Operators_Manual_48_Series-1.pdf
- Software Manual: LaserCut5.3-Software_Manual-V1.6.pdf
-- Main.ClifCox - 11 May 2016
Status
2024-08-05: It works!
The X,Y& Z axis are moving. The Spindle control is working UGS works well with the system.
- tickle_pulse.zip: Arduino code for laser PWM with tickle pulse.
Safety
This list is not all inclusive! Use machine at your own risk.
NOTE: THERE ARE NO SAFETY STOP SWITCHES ENABLED
It will gladly tear through the bed, or really try hard to run itself off the rails if you let it.
And if you are pinned between it and an edge, expect an emergency room visit if you are lucky. Use at your own risk.
- If the machine is moving in the wrong direction and headed towards disaster, HIT CANCEL IN THE UGS SOFTWARE
- Turning off the spindle with the light switch will just stop rotation.
- The machine is controlled separately and will keep moving, now damaging an end mill along with whatever else it was already damaging.
- If you are using the keyboard control to move the spindle, BE CAREFUL
- Please note that multiple taps of a key will stack.
- Be ready to hit CANCEL when moving large distances.
- Keep hair and loose clothing, and gloves away from the spindle when it is spinning.
- This is a standard shop safety tip for any spinning item.
- Gloves should not be worn when working with a spinning tool, as they can catch and break/tear off your hand.
Settings
Bold settings have been updated on 8/27/2024
To fine tune steps per mm, visit this site for instructions.
These are the settings used to make the machine work accurately. You can access them by following the linked instructions above. Please note: They have been calibrated as of 8/27/2024, and likely won't need adjusting for a little while. If you think something isn't working correctly, please check the Discord channel before making changes. If you do end up making changes, please keep a record on here of these previous settings.
$0 = 10 (Step pulse time, microseconds)
$1 = 25 (Step idle delay, milliseconds)
$2 = 0 (Step pulse invert, mask)
$3 = 1 (Step direction invert, mask)
$4 = 0 (Invert step enable pin, boolean)
$5 = 0 (Invert limit pins, boolean)
$6 = 0 (Invert probe pin, boolean)
$10 = 1 (Status report options, mask)
$11 = 0.010 (Junction deviation, millimeters)
$12 = 0.002 (Arc tolerance, millimeters)
$13 = 0 (Report in inches, boolean)
$20 = 0 (Soft limits enable, boolean)
$21 = 0 (Hard limits enable, boolean)
$22 = 0 (Homing cycle enable, boolean)
$23 = 0 (Homing direction invert, mask)
$24 = 25.000 (Homing locate feed rate, mm/min)
$25 = 500.000 (Homing search seek rate, mm/min)
$26 = 250 (Homing switch debounce delay, milliseconds)
$27 = 1.000 (Homing switch pull-off distance, millimeters)
$30 = 1000 (Maximum spindle speed, RPM)
$31 = 0 (Minimum spindle speed, RPM)
$32 = 0 (Laser-mode enable, boolean)
$100 = 28.214 (X-axis travel resolution, step/mm)
$101 = 45.16 (Y-axis travel resolution, step/mm)
$102 = 80.093 (Z-axis travel resolution, step/mm)
$110 = 1000.000 (X-axis maximum rate, mm/min)
$111 = 5000.000 (Y-axis maximum rate, mm/min)
$112 = 500.000 (Z-axis maximum rate, mm/min)
$120 = 10.000 (X-axis acceleration, mm/sec^2)
$121 = 50.000 (Y-axis acceleration, mm/sec^2)
$122 = 10.000 (Z-axis acceleration, mm/sec^2)
$130 = 200.000 (X-axis maximum travel, millimeters)
$131 = 200.000 (Y-axis maximum travel, millimeters)
$132 = 200.000 (Z-axis maximum travel, millimeters)
ORIGINAL X,Y,Z steps per/mm before 8/27/2024
$100 = 28.236 (X-axis travel resolution, step/mm)
$101 = 45.015 (Y-axis travel resolution, step/mm)
$102 = 83.657 (Z-axis travel resolution, step/mm)
